Quarantine = Garden Time
- Anah Witt
- Apr 27, 2020
- 7 min read
Tired of being cooped up in your house all the time? Want to start a useful project that produces visible results every day? Want an excuse to put your hands in the dirt and bring it inside your house? If you answered yes to any one of these questions, it's time to start some seeds inside!
For those of us who live in colder climates (yay lake effect!) and can't actually put anything in the ground yet except for potatoes for fear of frost, now is the perfect time to start some seeds indoors. While lots of plants grow well when put directly into the dirt after the ground is worked up and the weather is warmer (called direct sowing), there are also a lot of vegetable varieties that require a little extra effort. Tomatoes, peppers, and cruciferous veggies (think broccoli, cauliflower, Brussel sprouts) must go into the ground as a plant. If you direct-sow these little guys in northern climates or the American Tundra that is the midwest, they won't have enough time to reach maturity and bear fruit before the first frost kills them off sometime in mid-October.
"But don't I need a greenhouse?" you may ask, "But isn't growing little baby seedlings and getting them to survive long enough to plant outside super difficult?" you may inquire. No -- while having a greenhouse would be awesome, I do not have one and neither do lots of other at-home gardeners. I do, however, have a window that faces the south and a table that's about window height (mostly to prevent the cats from eating the plants) that I dragged into the kitchen. And I bet you do too. As for being super difficult, this is most definitely a myth carefully constructed and propagated by big-box garden companies. Walmart Garden Center, I'm looking at you.
Starting seeds indoors is easy, fun, and cost-effective. Plus, watching seeds germinate is way more fun that watching those Friends reruns for a fifth time this month or rereading Shutter Island for the fourth time. And, not only is planting your own garden a great idea in terms of sustainability (local food = less mileage to travel to get to you = less energy used), but it's also been great for my own well being (I am not a professional -- just a regular psych major so do with that what you will).
So now you know that you can start your own seeds indoors. Here's how to do it.
1. Acquire some supplies. You will need: potting soil, little containers (they make little veggie pots, but I find that yogurt containers, lettuce boxes, and those little plastic clamshells that strawberries come in work well. Or, if you have old veggie pots laying around from years past, now's a good time to reuse those guys.), and seeds. That's it -- that's all you need. Lots of garden centers and agricultural supply stores are open for online delivery, and most will have an online catalogue so that you can read about twenty seven different kinds of tomato seeds before deciding on one. Burgess is one of my favorites, and FedCo also supplies good seeds. When ordering seeds, those marked "heirloom" will produce seeds that you can collect at the end of the growing season and use for next year.
2. Put potting soil into your containers and follow the instructions on how deep to plant your seeds. If your packets don't have instructions, a good rule of thumb is to cover the seed with as much dirt as the seed is tall. So if your tomato seed is 1/4" tall, only bury it about 1/4". Lettuce barely needs covered at all -- just enough so that the seed can stay moist enough to germinate. Usually it's a good idea to put two seeds or so in each container as a safety net for low germination rates. If you've found a box of seeds in your basement and there are a whole bunch of old seeds, it's a good idea to plant one seed for each year that the seeds are old. So if you have seeds packed for 2014 (they'll say so on the packet), put six seeds in each container; 2018 seeds should have two seeds in each container. I've found that seeds older than 12 years typically don't germinate, but you could always pour the whole packet in and try it out. Once everything's planted, give it a good watering, but be careful not to pour so vigorously that your water stream disrupts your seeds. Some sources suggest that you cover your seeds with clear plastic (or a clear lid) with air holes until they germinate. I tried both covered and uncovered, and I saw no difference in germination rates. If anything, the cover didn't allow the potting soil to dry properly and I ended up with mold. If you do go the covering route, make sure it has air holes, that the sun can easily get through it, and that you remove it once you have sprouts.
3. Keep your seeds in a sunny spot and water them when the soil looks dry. Depending on the age of your seeds, you should expect to see tomatoes pop up 7-14 days after planting, peppers 14-20 days after planting, and lettuce and herbs 7-10 days after planting (except parsley, because for some reason that takes forever). Usually I give everything a little extra time -- inadequate water, cooler temperatures, older seeds, and burying the seeds too deep can all make seeds take longer to germinate. Be patient with your seedlings.
4. Once your seedlings start to come up, just keep watering them. This is a super exciting time as you watch all of your plants grow. Technically you're supposed to thin plants out (That's when you pinch off the weaker plants if you have multiple plants growing in one small container), but I feel so bad doing this that I don't. There's a way around it, I promise.
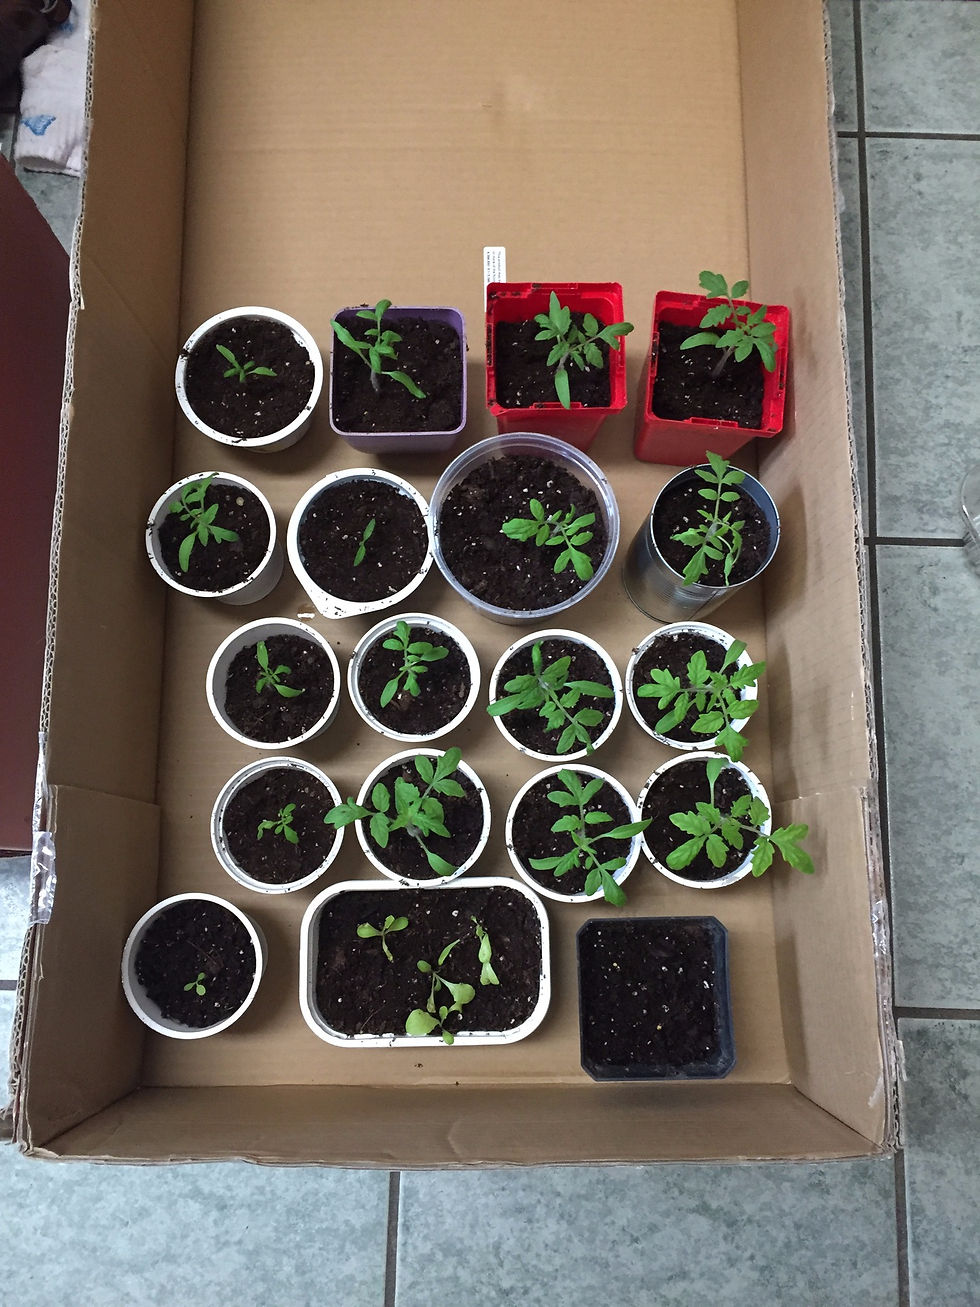
These are some plants that I started about three weeks ago. Clockwise from top left: tomato, tomato (lots of tomatoes), romanesco, tomato, cantaloupe, and winter squash. The tomatoes and squash are ready to be repotted -- I'll give the romanesco and cantaloupe another week or so.

4. Once your seedlings get big enough (or crowded enough) that they've outgrown their original pots, it's time to repot them. Find some larger containers; again, these could be from a garden store, they could be larger yogurt containers, takeout dishes, the bottoms of coffee bags, bean cans -- the possibilities are endless and your plants won't care what kind of container they're in as long as it's bigger than their current container. Fill your new container with dirt and make a little hole in the center with your hand. This is where you'll put your seedling. Carefully loosen the dirt from the sides of your plant's current container (smaller one) and pull it out. Be sure to pull the dirt out with the plant -- right now, the plants are so young and fragile that taking dirt off the roots could hurt them. Plop that guy and its dirt into the hole you made and bring the new dirt around it so that your plant is stable in its new pot. Pack it in well -- as your plants get taller, they'll want to fall over towards the sun so this is important.
Repotting is how I avoid thinning out my seedlings, since I don't like to kill them. In the picture above, you can see that there are a whole bunch of tomatoes in the pots -- way too many to facilitate healthy growth. Before separating plants, prepare enough larger pots so that each plant will have its own. Then you can take the plant cluster out of its pot -- be sure to also remove the dirt with the plants as to not disturb their roots too much. Hold the entire dirt clod in your hands and gently work it apart so that each seedling is separate. Depending on how close together your seeds grew, this might take a little time. Just be patient with it. If your seedlings seem like the roots are breaking too much (there will always be a little breakage in separation), you can always make the call to just let them grow together and see what happens. I've had lots of successful tomatoes that grew in pairs.
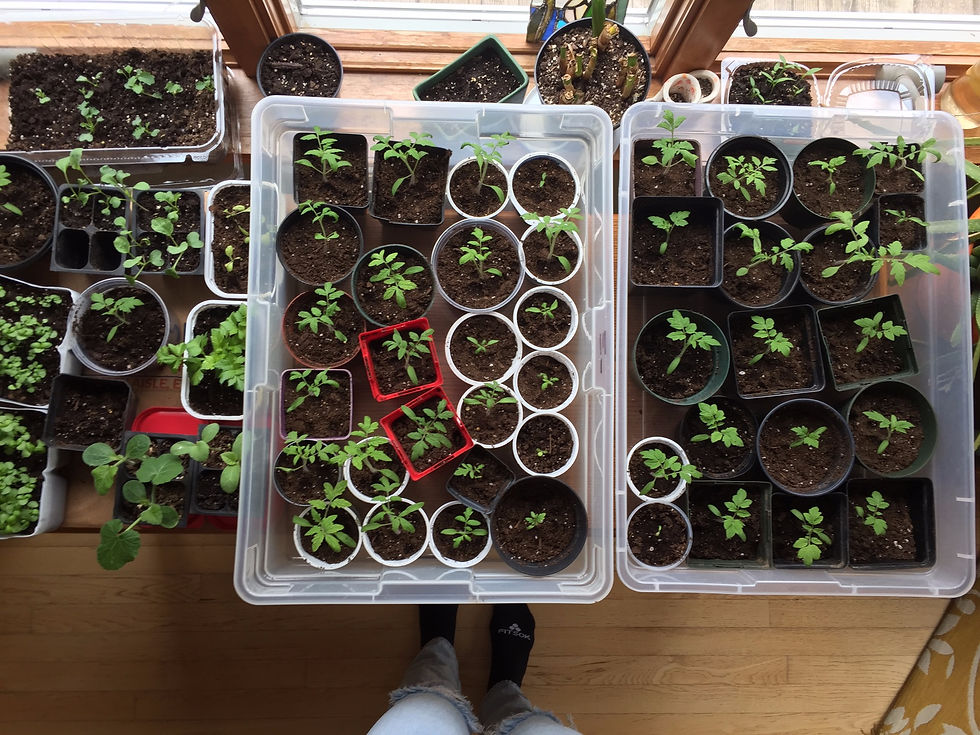
Below: the tomatoes have been repotted! Peanut butter jars, tin cans, yogurt containers, and cottage cheese containers all serve as excellent pots.

After repotting, your plants might look a little sad. Don't panic -- most of the time they'll perk back up within a day or two. And if not -- repotting, especially when separating is involved, doesn't always have a 100% success rate. No worries -- just focus on the plants that you do have.
5. As your seedlings get bigger, it's important to keep them in a sunny space and keep watering them when the soil gets dry. I like to rotate my plants every couple of days so that they don't all grow sideways, as they will reach towards the sun.
Below: The seedlings! Tomatoes, squash, basil, romanesco, cantaloupe, and peppers have completely taken over my kitchen. I have 45 tomato plants. Did I go overboard? Yes. Do I regret it? No.

One last thing about starting seeds indoors -- if you have limited outdoor space, you can eventually move your plants into really large pots and put them out on a balcony or even near a window (pollination tips for indoor spaces to come). Herbs and root vegetables like radishes and beets do not need pollination to grow well indoors, and can be grown in pots even when no outdoor space is available.
As the tomatoes grow and the weather warms up, I'll keep everyone up to date on techniques to harden off plants, fertilizer options (hello, coffee grounds), and planting outside. Although I've been gardening since I could walk, this is my first time growing all of my own plants inside. We'll learn together, and I'll do my best to impart wisdom and all that jazz.
For now, happy planting and keep on keeping on!


Commenti